The Powerful Pro Contrast Plugin in the Nik Collection 7
When it comes to photo editing, I love experimenting with many different tools. Together with Capture One and Lightroom as the foundation of my workflow, I rely on Photoshop and other third-party tools to create more advanced adjustments to my images.
One of those magic tools I've been using since I got into photography many years ago is Nik Color Efex.
If you’re new to Nik Collection 7 plugins, this is a set of amazing plugins for Adobe Lightroom and Photoshop.
Nik Collection 6 has eight plugins: Color Efex, Analog Efex, Dfine, HDR Efex, Viveza, Sharpener, Perspective, and Silver Efex. Each plugin offers something different and is worth exploring and experimenting with, but for me, the highlight of the Nik collection is Color Efex (…and Silver Efex for black & white conversion).
In this article, we will explore one of my favorite methods for improving the contrast in an image, which involves using a smart and powerful tool in Color Efex, the Pro Contrast.
RAW File Preparation
Before using Color Efex you need to prepare your raw images in Capture One or Adobe Lightroom. Color Efex can only work with rasterized images, such as 16-bit TIFFs, not raw files.
To get the best results, follow these steps:
Start with a color raw file and fix any issues with lens distortion, chromatic aberration, and white balance.
Remove noise and optical vignette in Lightroom or Capture One.
Adjust the exposure and contrast of the raw image if it has too bright or too dark areas. Aim for a balanced histogram that preserves the tonal range of the image.
Cropping is also something you need to think about. Color Efex does not have a cropping tool, and it cannot undo a crop that you have done before. It is better to keep the original size and shape of your raw file when you import it. This will give you more options later when you work with the TIFF file that Color Efex creates.
After these basic steps, you can export your image as a 16-bit TIFF and open it in Color Efex to apply your desired effects.
To use Color Efex to edit a raw image file, you can do so by following these steps:
First, locate the raw image file on your computer. Then, Right-Click on it to open a menu of options.
Next, look for the option that says Nik 7 Color Efex and click on it. This will launch Color Efex and import your raw image file into it, as shown in the image below.
You will see a new window that gives you three options: Edit a Copy, Edit a Copy with Lightroom Adjustments, or Edit Original. If you want to start editing a new image from scratch, the best option is Edit a Copy with Lightroom Adjustments (We will use Edit Original later).
The default settings are as follows:
image file format set to TIFF
16-bit color depth
sRGB color space
240dpi resolution
no compression.
However, I prefer using the ProPhoto RGB color space, as it allows me to capture more and better color information from the raw file compared to sRGB.
When I click Edit, Lightroom creates a copy of the original raw file and adds it to the catalog. Subsequently, it opens the copy in Color Efex, which I can then edit.
If you want to open up an image directly in Photoshop there is a very convenient palette where to select the plugin from the full collection.
Or you can go to the top bar menu, select Filter > then select Nik Collection > and choose Nik 6 Color Efex.
Explore the Pro Contrast Filter
There are so many filters inside of Color Efex; in fact, there are 55 filters. However, I use just a few of them, and my favorite one is the Pro Contrast.
This effect is pretty powerful. It works very differently from the regular contrast control you find in Lightroom, and it features some amazing controls.
Let’s start with the Correct Color Cast function.
Correct Color Contrast
This is a truly unique feature that goes beyond traditional contrast adjustments.
Its primary function is to correct color casts. When you use this software, it thoroughly analyzes your image to detect any color cast present.
Upon finding one, simply sliding the adjustment slider to the right will effectively eliminate it.
Here below on the left the original RAW file with no adjustments (there is a greenish tint because of the reflected light on the vegetation), and on the right the corrected version in Color Efex.
Correct Color Cast vs. White Balance?
At this point, you might be wondering, why don’t use the white balance in the RAW developer?
Well, sometimes it’s now easy to nail the perfect white balance and this tool (Correct Color Cast) comes in handy to quickly tweak the color cast easily and effectively.
The effectiveness of both tools can vary depending on the complexity of the color cast and the lighting conditions of the original image. Some images may be better served by the automation of the "Correct Color Cast" in Pro Contrast, while others may require more precise manual adjustments using the White Balance control.
If you go over the top menu in Color Efex, select Help > User Guide, it’ll take you right to the user guide where you can look up all the different filters and see how they all operate.
So, as you can see, what the pro contrast filter does it provides advanced options that change the color and contrast of images by analyzing each one and making improvements based on their specifics use this filter if you want to increase contrast levels while maintaining detail throughout the image.
That’s pretty cool. Now, let’s discover what the other sliders do.
Correct Contrast
This slider increases the contrast in the image according to the distribution of light and tone. So, this is a smart contrast adjustment.
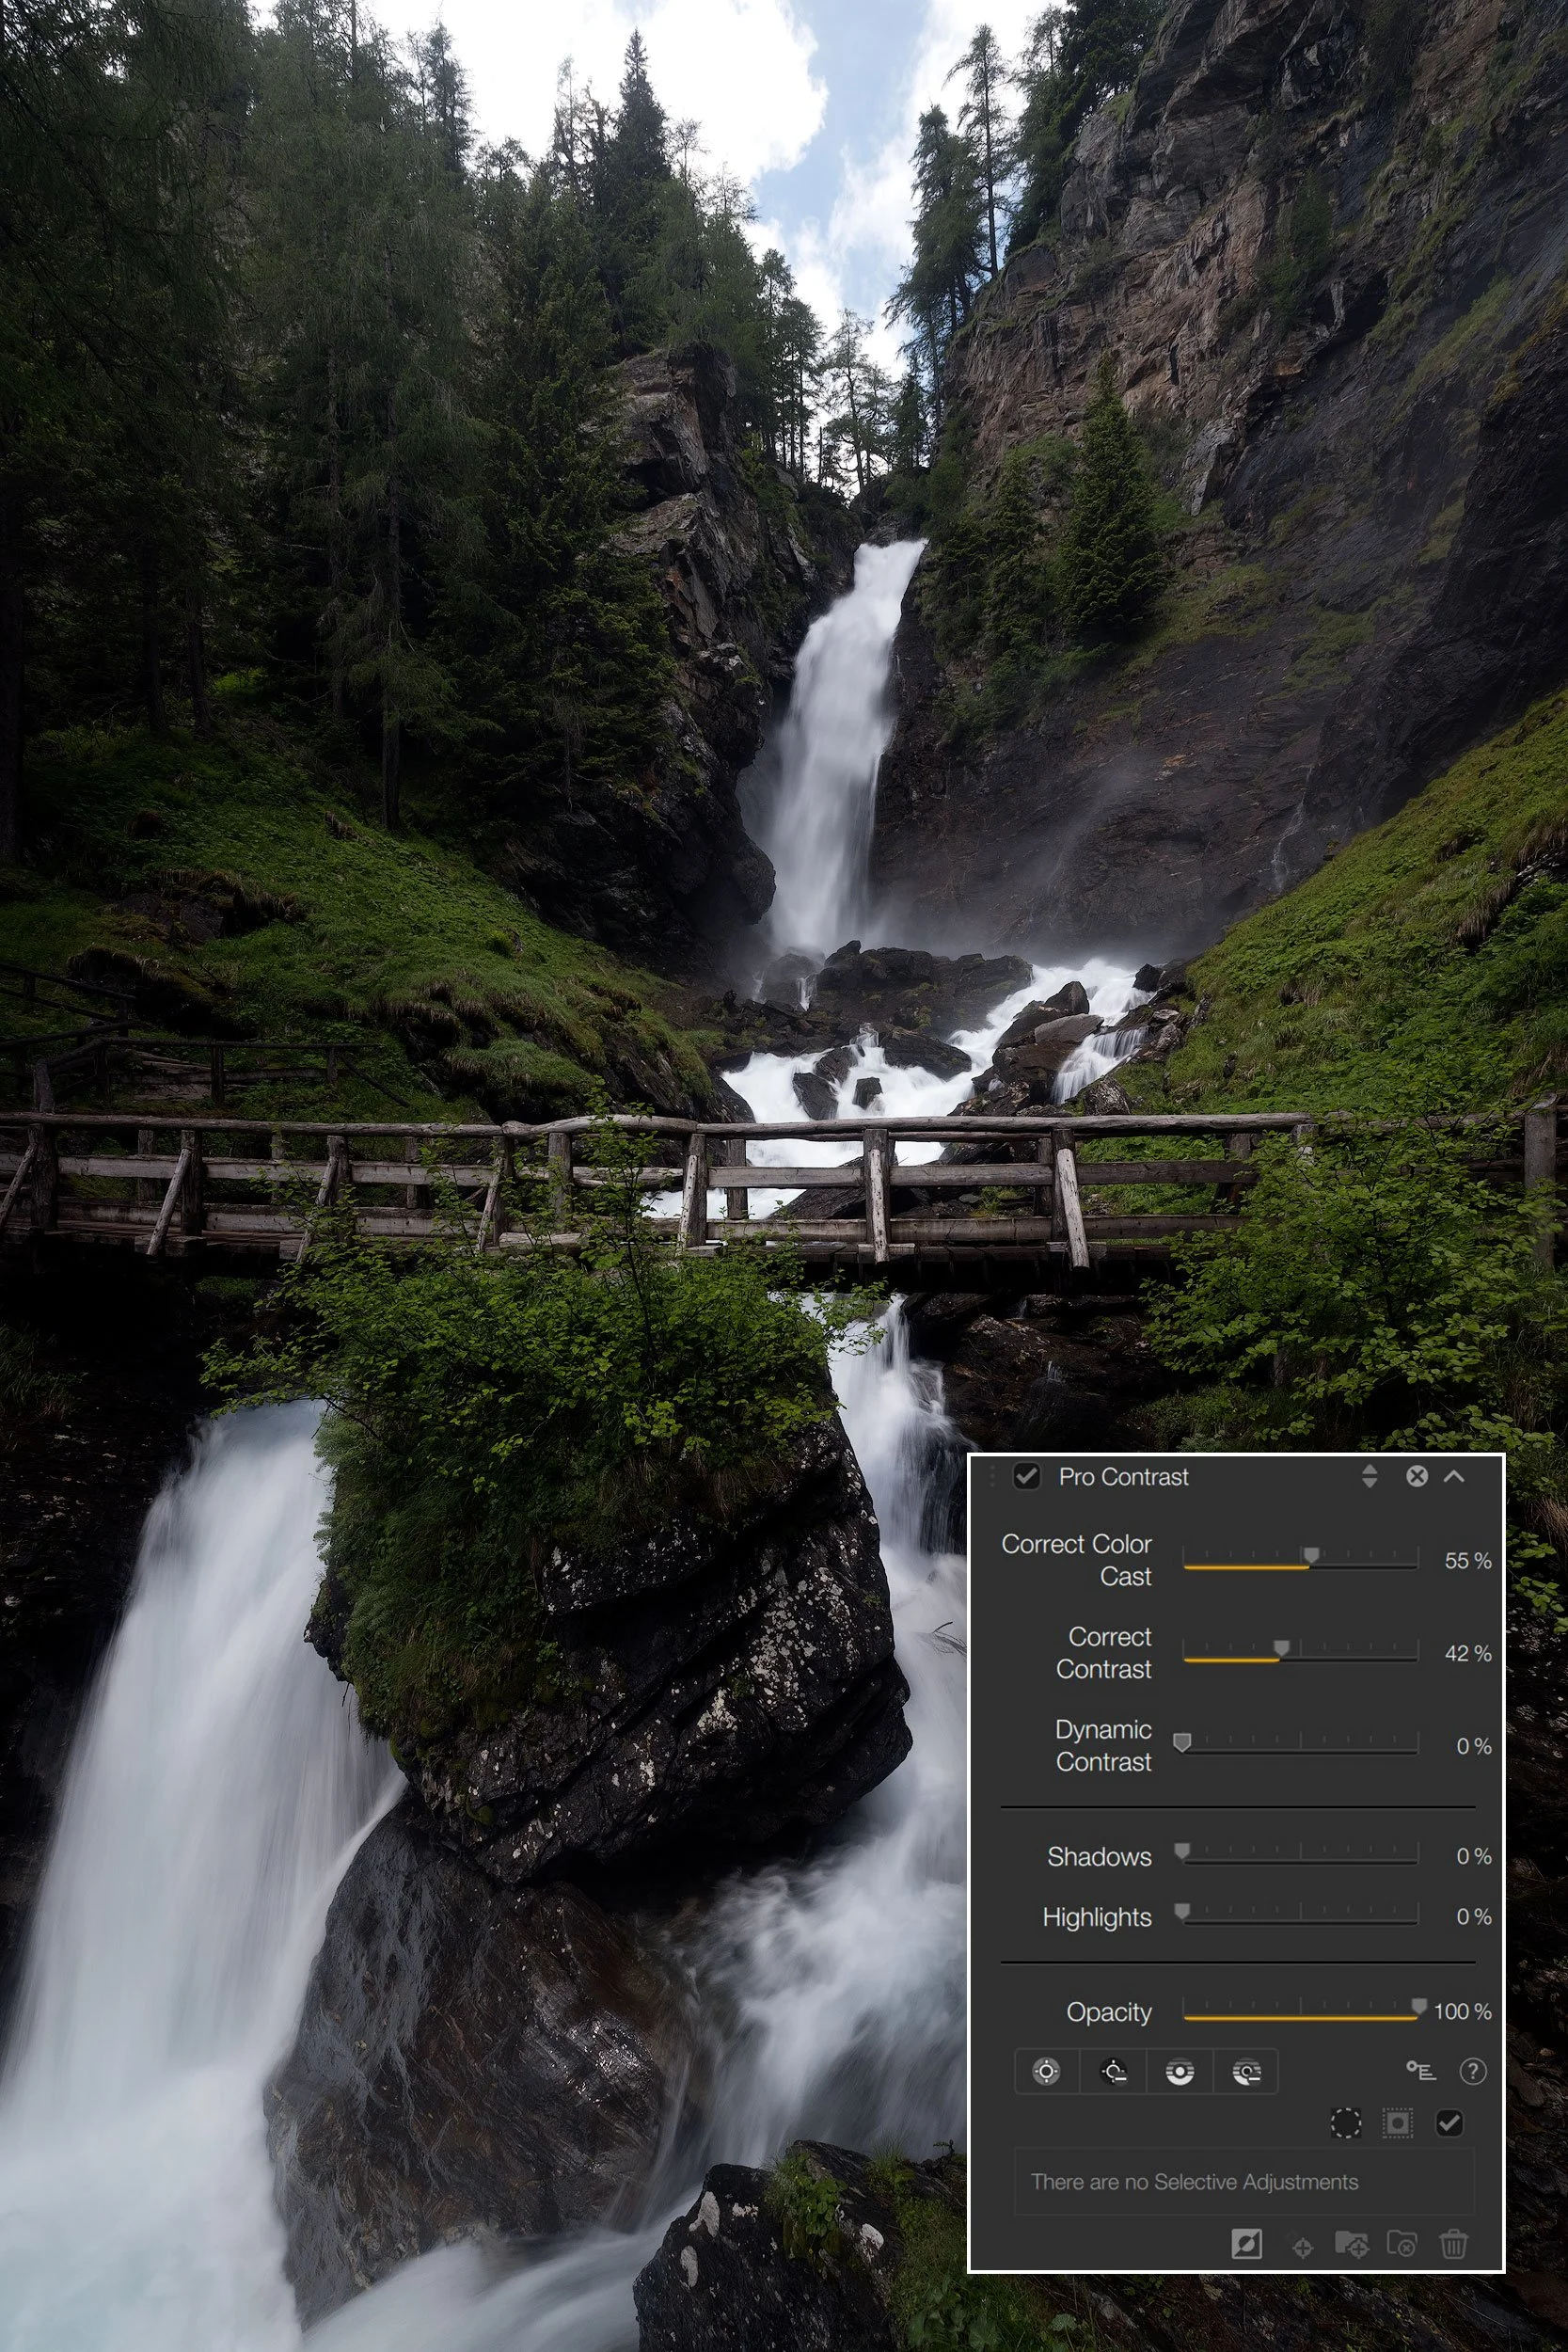
I increased to Correct Contrast slider up to 42%, which seems to be a nice amount of contrast. I also decrease a tad the Correct Color Contrast value to 55%.
Let me show you the same image with the Contrast value set to 100% to compare it with the regular Contrast slider in Lightroom and Capture One. However, it's worth noting that pushing the contrast level to such an extreme (100%) is quite unlikely in normal editing scenarios. This demonstration is solely for the sake of showcasing the impact of extreme contrast adjustments.
The difference is significant. The Pro Contrast performs pretty well and doesn’t crush the shadow as much as Lightroom and Capture One.
On the other hand, it does tend to blow out the highlights more than Lightroom and Capture One, where those levels are better controlled.
The Pro Contrast has two other very handy features: the Shadows and Highlights sliders. These sliders help protect shadows and highlights when the level of contrast increases.
By turning on the Shadows and Highlights warning, it becomes much easier to visualize which areas are losing detail.
Here on the left, you can see two spikes on both sides of the histogram.
Here below the result. The difference is subtle, but it's essential for maintaining the overall balance and preserving the integrity of the image.
By preventing the shadows from becoming too dark or the highlights from getting too bright, the image maintains a more realistic and visually pleasing appearance.
Using the Shadows and Highlights sliders in conjunction with the Pro Contrast feature allows you to have more control over the dynamic range of the photograph, enhancing its overall visual impact.
Now let’s move over to my favorite slider, the Dynamic Contrast.
Dynamic Contrast
This is the best part of this filter—I absolutely love it!
It analyzes the entire image and adjusts the contrast of each area in your image based on the tonality. The awesome part is that it works on the mid-tones of the image without making the shadows super dark or blowing out the highlights to pure white. No to be confused with the Clarity slider you can find in Capture One or Lightroom. It’s something totally different.
You can notice the impact of this slider in several ways:
First and foremost, it enhances the clarity of the image, making the details more pronounced and defined.
Secondly, it has the ability to brighten up the shadows, unveiling hidden details that were previously obscured.
Lastly, it can also deepen the highlights, bringing out additional details that were not as noticeable before.
Frequently, moving the slider to its maximum value causes an overly strong adjustment in certain areas of the image.
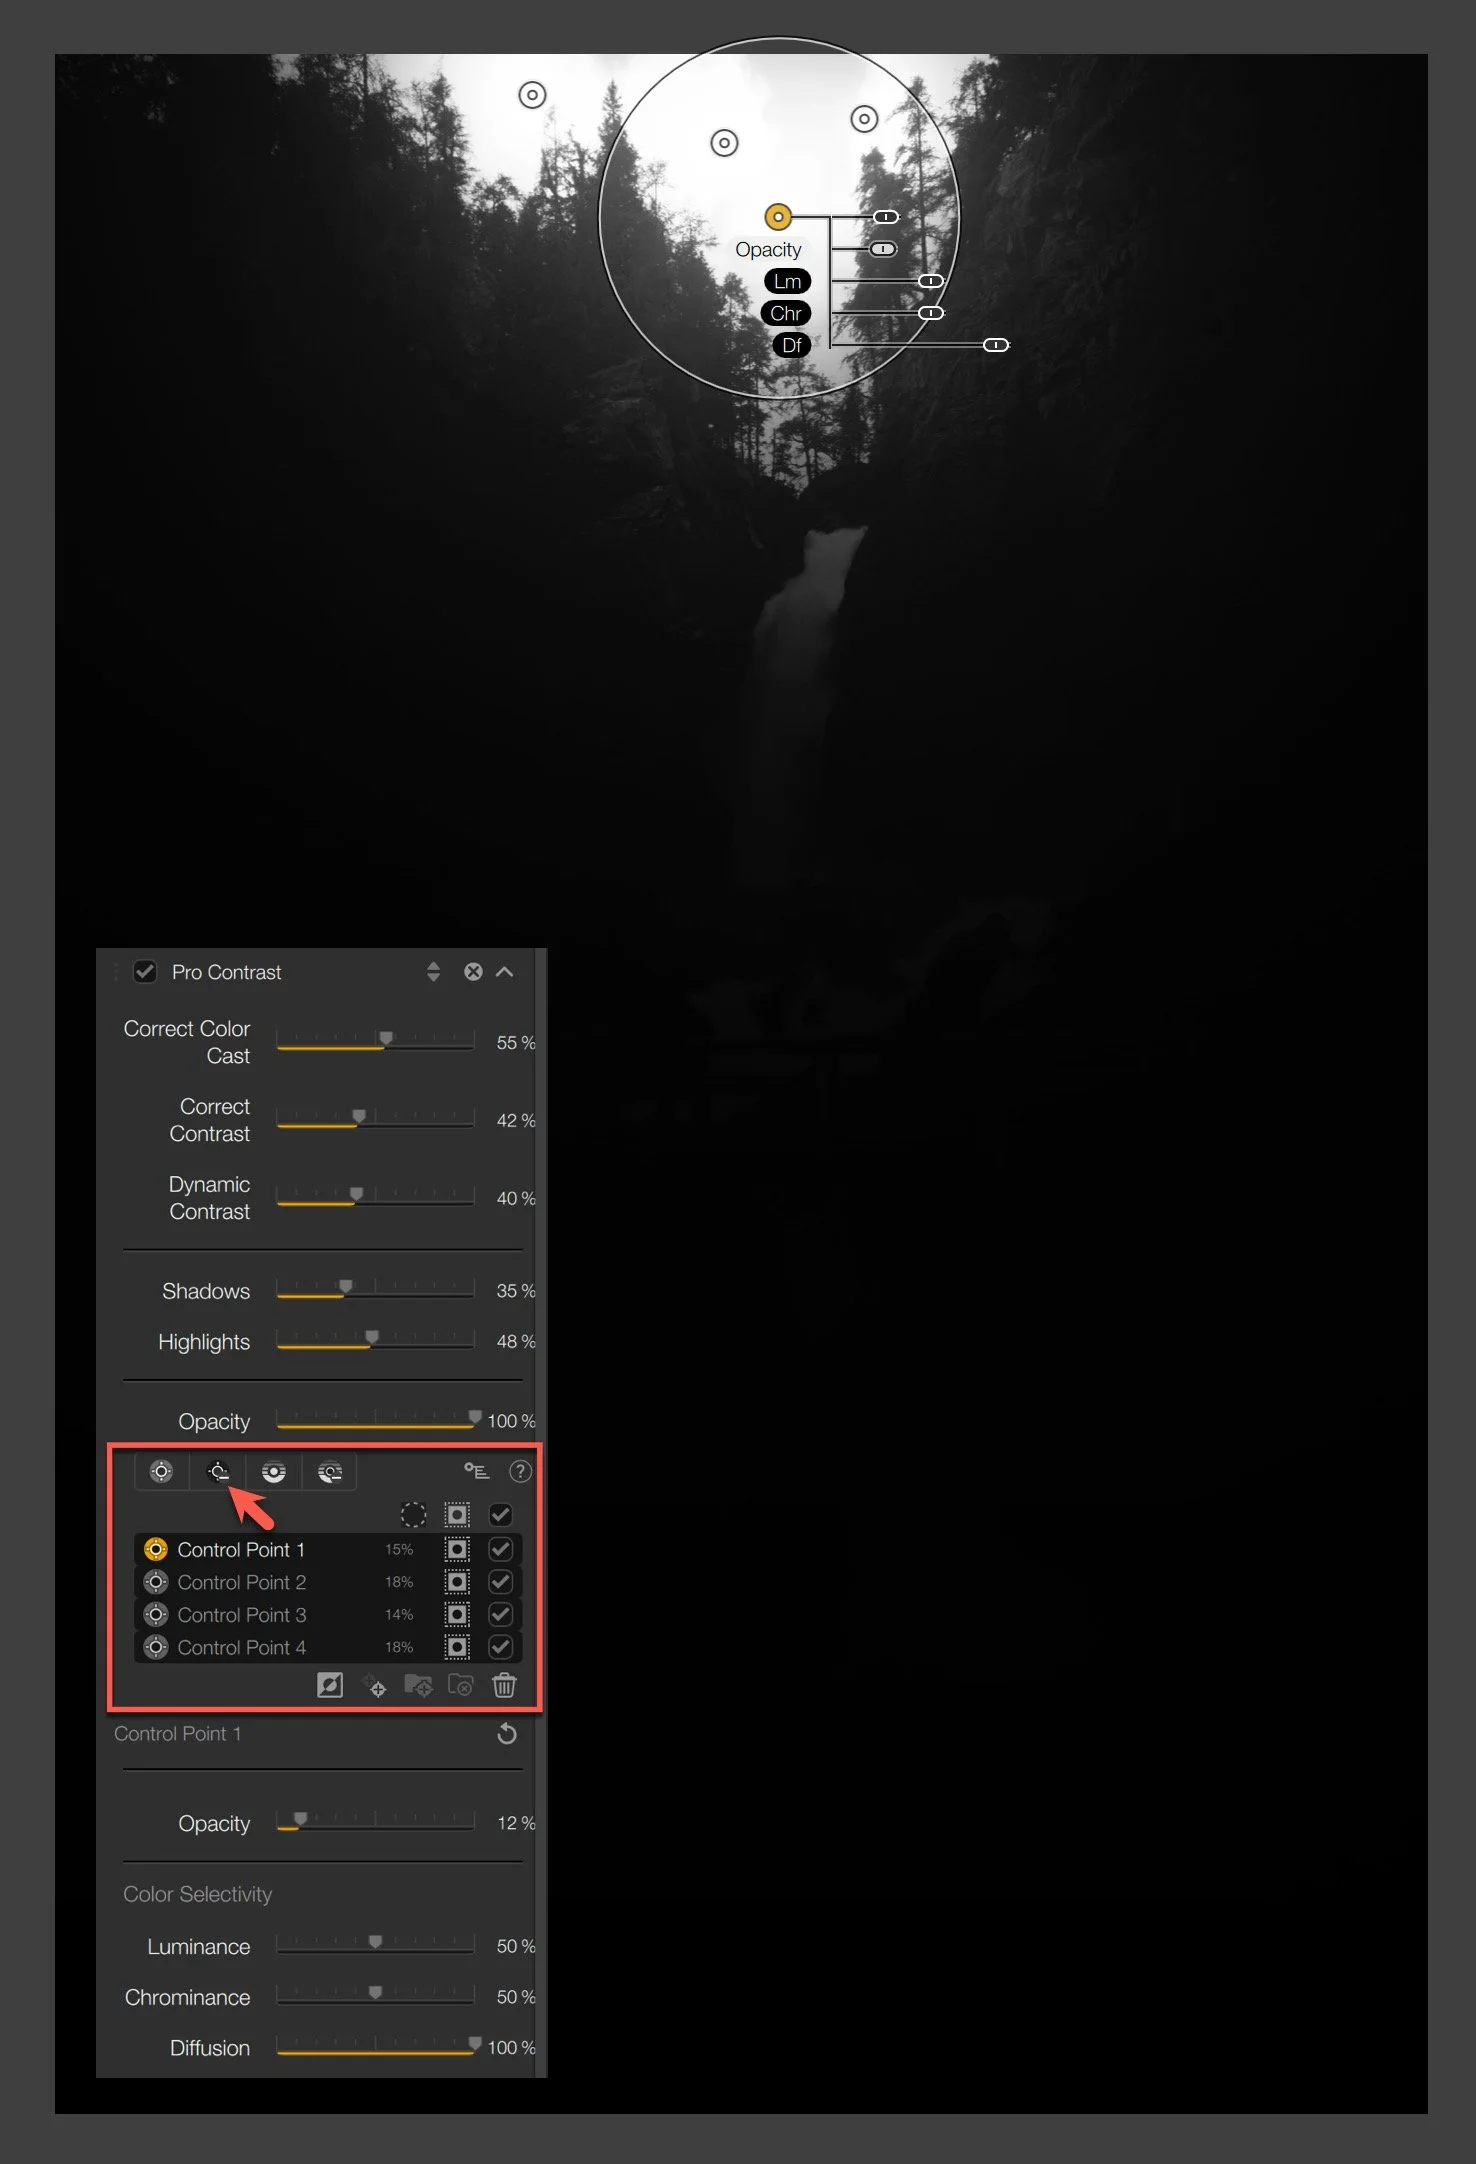
That's why it's better to use the filter with Control Points, allowing you to apply the adjustments selectively and precisely where you need them. This way, you can have better control over the effect and achieve more balanced enhancements in your photo.
For example, increasing the Dynamic Contrast up to 100% makes the image too HDR-ish and unnatural for my liking.
Control Points
As I mentioned before, another cool set of controls is the Control Points.
In Color Efex Pro, Control Points are a powerful tool used for selective adjustments in your photos. When you apply a filter or effect using Color Efex Pro, the Control Points allow you to target specific areas of the image to apply or exclude the effect.
They work by analyzing the tonality, colors, and other attributes of the area you place them on and then apply the filter's adjustments only to that particular region.
Here's how they work:
Selective adjustments: Let's say you don’t want to apply the Pro Contrast effect on the sky. You can use one or multiple Control Points to target just the sky and exclude it from the adjustment without affecting the foreground or other parts of the image.
Easy placement: You can simply click on the area you want to adjust, and the Control Point will automatically detect the appropriate region based on the image's characteristics.
Adjustment customization: Once you place a Control Point, you have the option to fine-tune the size of its area of influence and the intensity of the effect. This level of control ensures that your adjustments are precise and blend seamlessly with the rest of the image.
Stacking multiple Control Points: You can add multiple Control Points to address different areas of your photo, applying different settings to each Control Point. This allows for complex and nuanced adjustments that are tailored to specific parts of the image.
Using Control Points in Color Efex Pro gives you the flexibility to enhance your photos with incredible precision, making your editing process more efficient and effective while maintaining the natural look of your images.
Conclusions
I hope this article inspired you. Plug-ins like the Nik Collection can open up new possibilities for you, both creatively and technically, without you spending a lot of time in Photoshop.
This plugin is extremely effective and versatile and I highly recommend Nik Collection 7 plug-ins for any landscape photographer who wants to streamline his workflow and expand creativity with new tools.
Perhaps one of the most impressive aspects of Nik Collection 7 is the seamless integration with popular photo editing software. Whether you use Adobe Lightroom, Capture One, Photoshop, or other standalone applications like Affinity Photo, these plugins blend effortlessly into your existing workflow.
This means you won't need to spend hours learning new software; instead, you can focus on what truly matters - capturing and refining your artistic vision.
Your thoughts…?
Have you ever used Nik Collection plugins before? If so, what’s your favorite tool in the collection?
Let me know in the comments!


